Macintosh OSX:
How to Recover your UVM Mail folders
(This is for use with ALL folders other than your Inbox)
This process will only work for emails and folders which have been backed up by the server overnight. This means that files and folders which were created and deleted in the same day, cannot be recovered.
Lets get started:
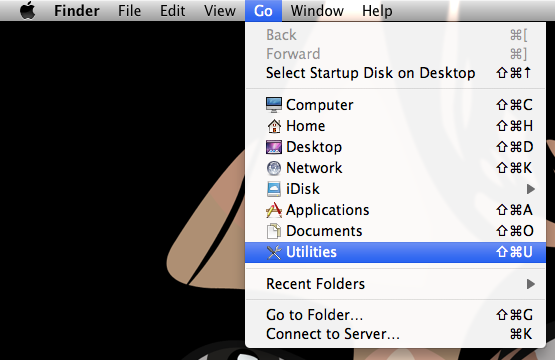
Click “Go” —> then click on the “Utilities” icon.

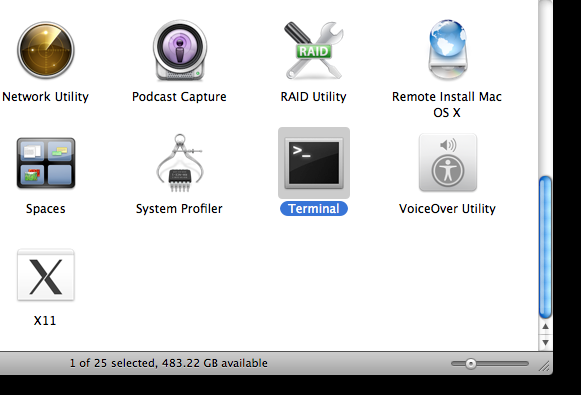
From the “Utilities” folder, scroll down and click on the “Terminal” icon.

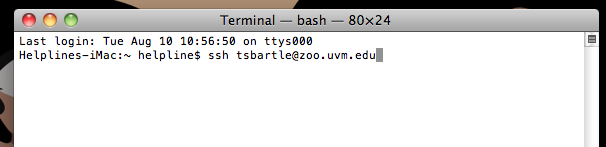
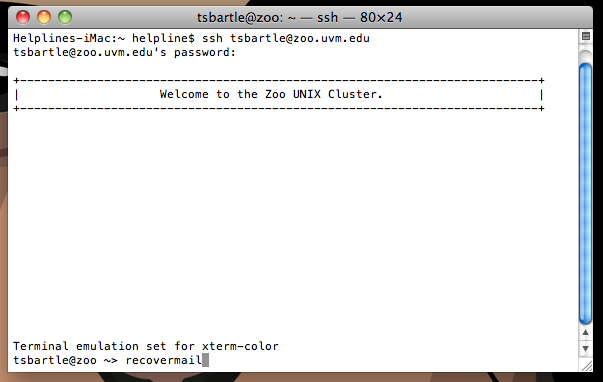
A white box will appear. To login you will need to use your netid and password (this is the same username and password you use to login to your UVM email)
Example #1:
My NetID is tsbartle the correct way for me to login would be:
ssh tsbartle@zoo.uvm.edu
Example #2:
To login type the following:
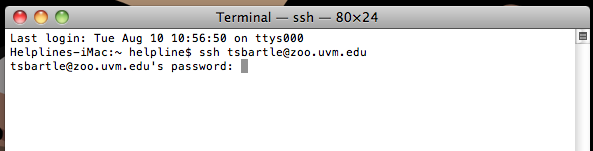
ssh “your_netID“@zoo.uvm.edu
then press Enter.

Enter your UVM password.
NOTE** the cursor will not move while entering your password, this is normal
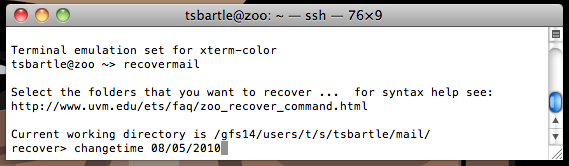
Now you will need to enter the “recovermail” command, then press Enter.
This command puts us in recovery mode. From here we can choose which date we would like to recover from.
In this example, we are going to pretend that I have just deleted an important email from my “Sent Items” folder.
The first step is to recovering my mail is to use the “changetime” command. This command allows us to change the date to a
recent backup that took place before the email message was deleted.
Example:
changetime 08/05/2010
the example above has changed the time to Aug 5th 2010

Now that the backup from 08/05/2010 has been retrieved, I will need to list the folders that were available from that backup.
To list your folders use the “ls” command (LS)* then press Enter.
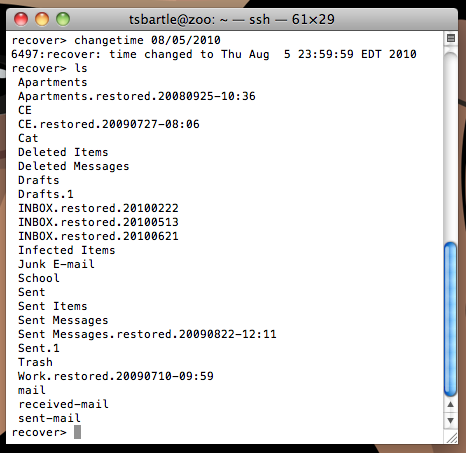

A list of all the available folders will appear. As you can see, my “Sent Items” folder is listed.
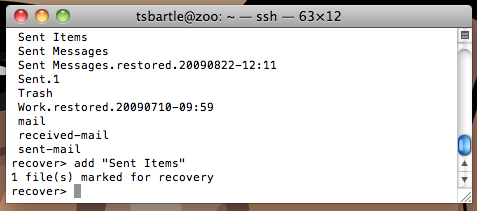
The next step is to mark the folder(s) you wish to recover. To do this you will need to use the “Add” command.
Example:
add “Sent Items”
Note** You muse use quotations around folder names with _spaces_ or CAPS in the name.
Be sure to spell the folder name EXACTLY as is appears on the screen, including spaces and Caps.

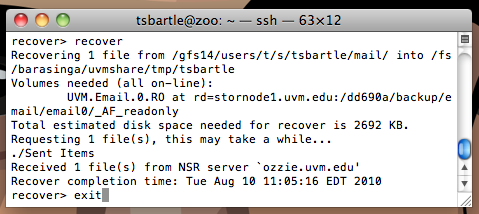
When you have finished marking your folder(s) for recovery, you will want to use the “recover” command
to complete the recovery. Type recover at the recover> prompt (as shown in the image below)
Then press Enter.

IMPORTANT!!!
THE FINAL STEP:
type the “exit” command at the recover> prompt, then press Enter to complete the file recovery.
Login to your webmail and look for a folder similar to:
your_folder_name.restored.2010xxxx