Windows:
Installing and setting up Thunderbird from the UVM Software Archive
Go to: www.uvm.edu/software
You will be asked to enter your UVM NetID and Password (same username and password you use to login to your UVM email).
Image may be NSFW.
Clik here to view.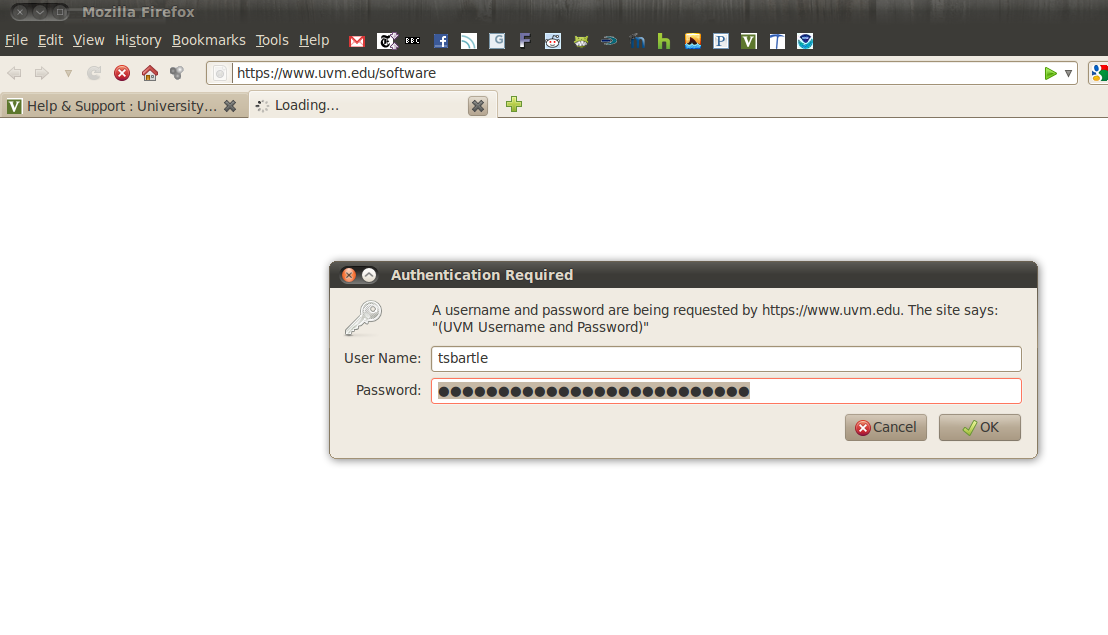
After you login you will be brought to a page where you can select your platform. You will want to click the “Microsoft Windows” link.
Now that you have selected your platform, you can scroll down to Thunderbird and click on the “Download Thunderbird Now” button.
Image may be NSFW.
Clik here to view.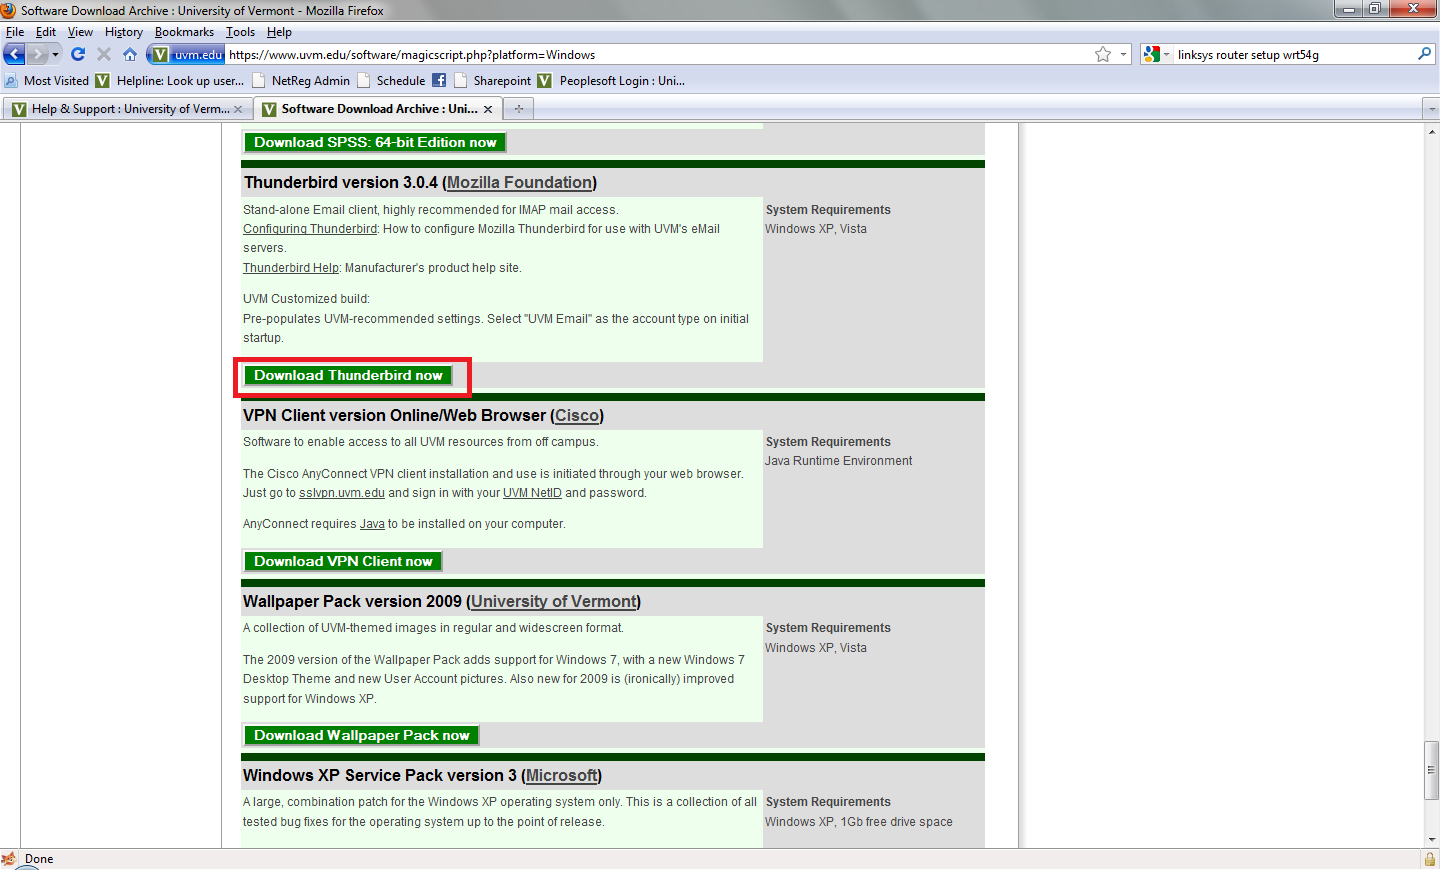
After clicking the Download Thunderbird Now button, a dialog box will appear. Click “Save File”
Image may be NSFW.
Clik here to view.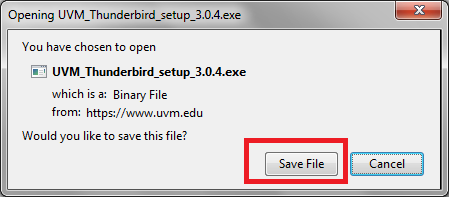
When the download completes you can start the installation by double-clicking on the “UVM_Thunderbird_setup_3.0.4.exe”
Image may be NSFW.
Clik here to view.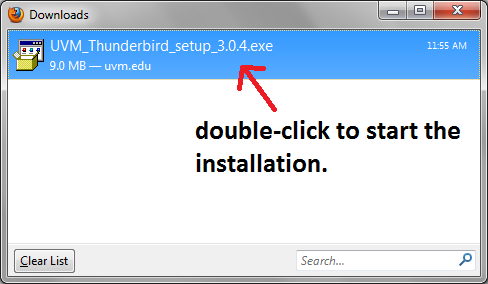
A box will appear asking you if you wish to run this application. Click the “Run” button.
Image may be NSFW.
Clik here to view.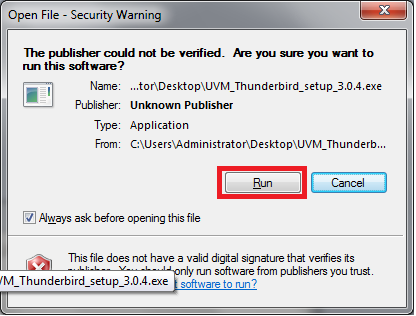
The installation process will begin. A screen similar to the one below will appear, click the “Next” button.
Image may be NSFW.
Clik here to view.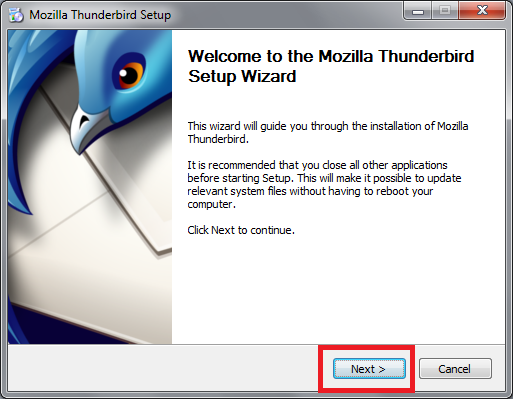
Make sure “Standard” install is selected, then click the “Next” button.
Image may be NSFW.
Clik here to view.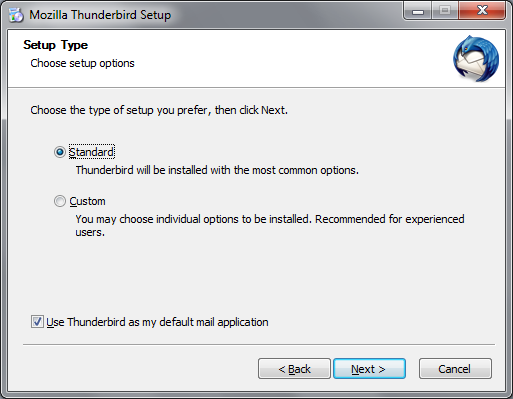
The next screen is asking where you want to install the program. Leave these settings alone and click the “Install” button.
Image may be NSFW.
Clik here to view.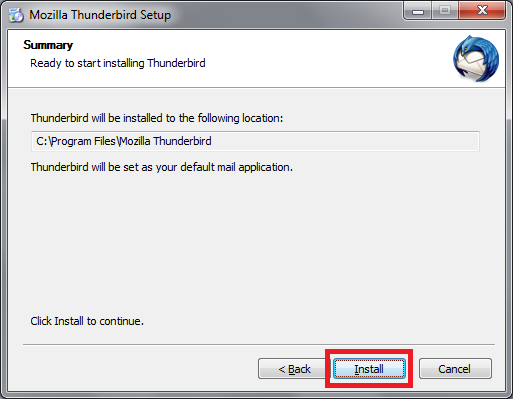
When the install completes a screen similar to the image below will appear. Click the “Finish” button.
Image may be NSFW.
Clik here to view.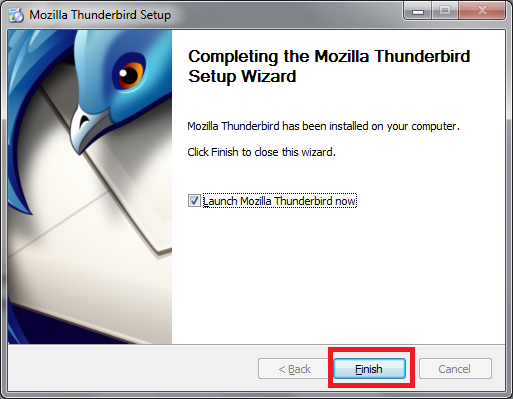
Thunderbird: Account setup
The first time Thunderbird opens you will be asked to create a new account. The good news is, there is an option for an “UVM Email Account”
this automatically sets up the account to work with your UVM email address.
Select the “UVM Email Account” option, then click the “Next” button.
Your screen should look similar to the image below.
Image may be NSFW.
Clik here to view.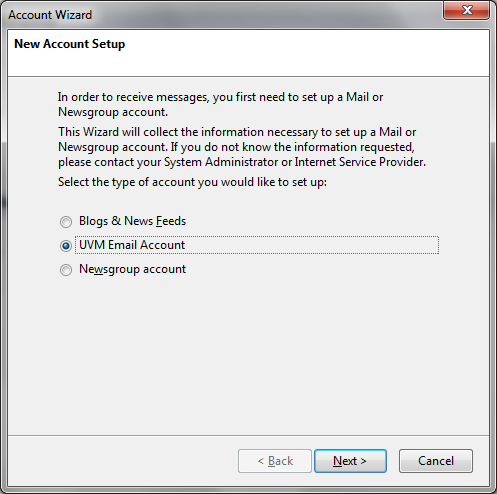
The next step requires you to enter “Your Name:” and “UVM NetID”
After entering your information, click the “Next” button. Be sure to use the “short form” of the netid in the second box (I used tsbartle, not Travis.Bartlett).
Image may be NSFW.
Clik here to view.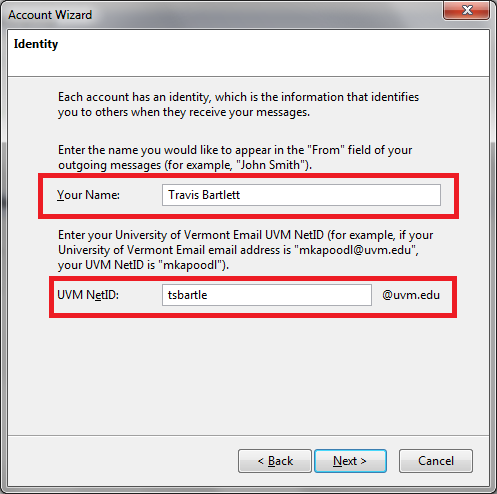
Check your settings to make sure you have entered your Name and NetID correctly.
Image may be NSFW.
Clik here to view.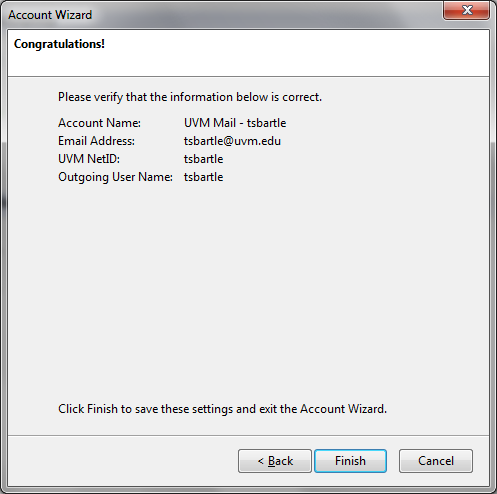
The final step is to enter your password. Your screen should look similar to the image below.
Enter your UVM password in the password field, then click the “Ok” button.
Image may be NSFW.
Clik here to view.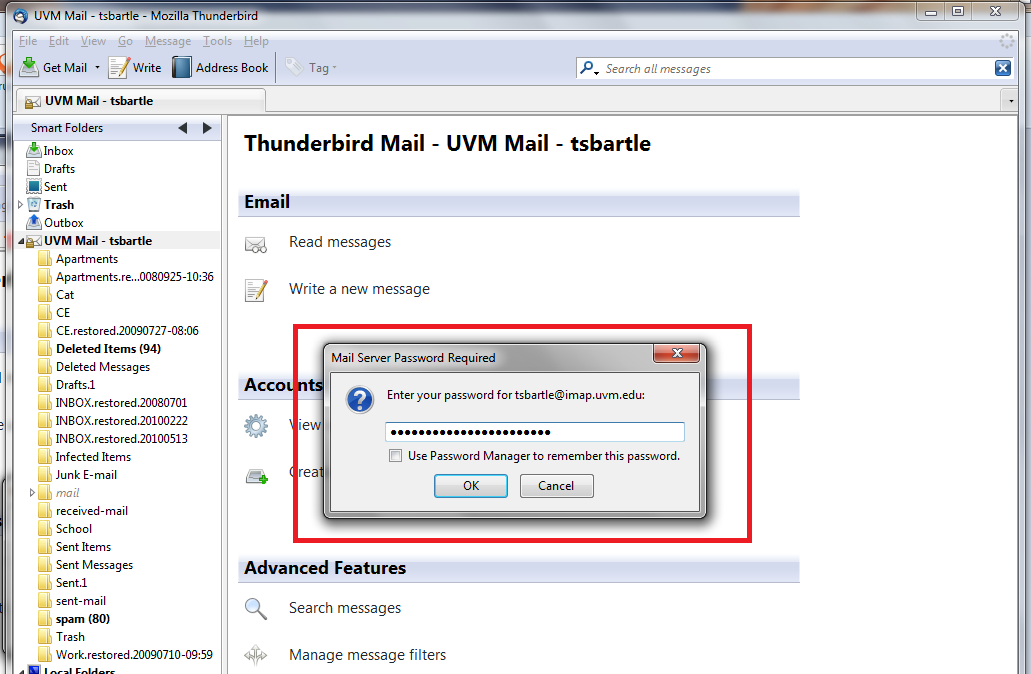
You now have successfully setup your UVM Email account to work with Thunderbird. To set up the LDAP directory (to auto-populate UVM email addresses when composing email) see the article on Thunderbird and the UVM Directory.